

How to Create a Lens Flare in Photoshop
If you’ve ever wondered how to create a lens flare in Photoshop, this article is for you. Learn how to adjust the aperture, add a sun glow to your lens flare, and remove it in Photoshop. You can even try this technique on a photo of your favorite place! But be warned: it can be time-consuming! There’s a better way. Learn how to create a lens flare photoshop effect and get amazing results!
Create a lens flare effect in Photoshop
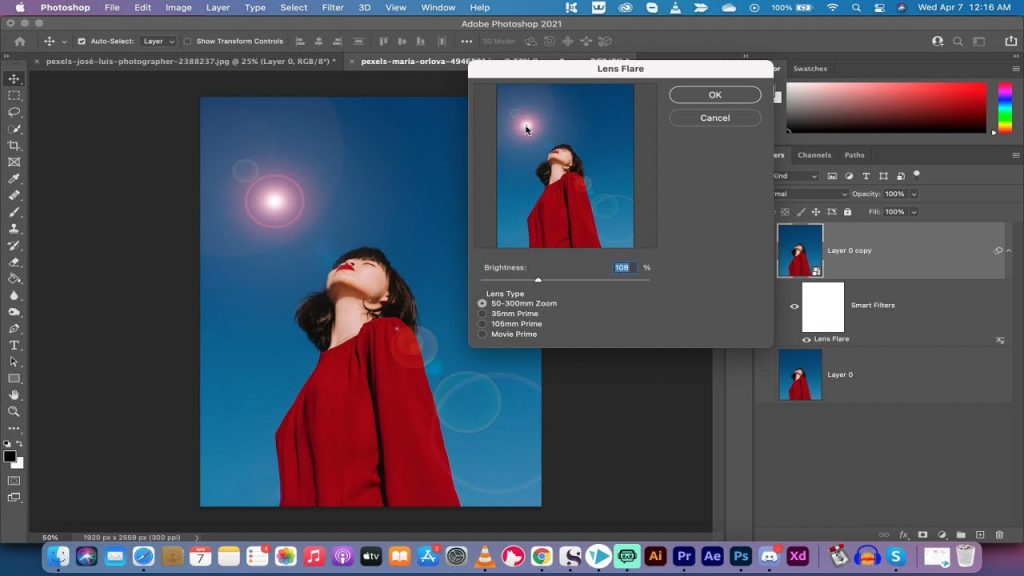
To create a lens flare effect in Photoshop, you need to open a photo in the program. Next, create a new layer on top of your photo and set the foreground color to black. Press Option or Alt+Del to fill the layer with the black color. Click the Blending Options button to change the blending mode of your layer and make all black pixels transparent. After you have made your selection, click the ‘Lens Flare’ button to see the different options.
After locating the light source, choose a spot on the canvas where you would like to apply the flare effect. This can be anywhere on your photo. You can move the target symbol around by holding the left mouse button. When you find the spot, click OK. You can now customize the color of the flare effect by choosing colors and sizes. To add multiple lens flares to an image, use the “Lens Flare” filter.
Adjust the aperture
Using a photo editing program such as Photoshop, you can add a lens flare to your images. This special effect is created by light scattering inside the lens’s various components. The amount of light scattered will vary depending on the type of lens you are using. To customize the lens flare effect, you can adjust the aperture of your photo and the strength of the brush. Then, simply click OK to finish the process.

To enhance the intensity of the light source, try shooting in the afternoon or early morning, when the sun is low in the sky. This is called the golden hour, and the sun will remain low for a specific amount of time depending on your location. To get the best effect, experiment with different apertures to see what works best for you. You may want to experiment with different settings until you find the perfect one for your photographs.
Add a sun glow to your lens flare
You can add a sun glow to your lens flare photo in Photoshop. It’s a great way to enhance the colors of your sunsets. The first step is to create a new layer and fill it with black. Then, click on the filter icon and choose “Lens Flare” from the drop-down menu. You can also change the blending mode of the layer to’screen’ to make the black in the layer transparent.
Another tip for making your sun appear brighter is to adjust the aperture on your camera. The wider the aperture, the more diffuse the flare will be. However, a wide aperture can cause the depth of field to become narrow and the subject to appear out of focus. A smaller aperture, or f-stop, will allow the lens to pinpoint the sun as a star-like pattern. By adjusting the aperture, you can get the desired sun glow effect in your lens flare photo.
Remove a lens flare effect in Photoshop
To remove lens flare effect in Photoshop, follow these steps. First, select the layer you want to remove. Make sure that the layer’s visibility icon is black. Then, use a brush tool to paint over the flare. You’ll see a second image below the lens flare. Next, change the brush colour to white. Finally, click OK. Repeat the process to remove lens flare effect in Photoshop. Hopefully, you’ll see the photo you’re after without the flare effect.
Now, it’s time to fix the flare! To start, you can use Photoshop to remove lens flare effect. First, open the lens flare photo. Make sure that you’re working with the same settings. You’ll need to make sure that the camera is on the same settings as the second image. Next, select the top layer mask and invert it. This will reveal the lens flare image underneath. Finally, use a soft white Paint Brush to delete the flare.