
Three Ways to Posterize Your Images in Photoshop
There are three ways to posterize your images in Photoshop: the “Magic Wand” tool, downsampling in the time dimension and bit rate, and creating a fake vector effect. All three can be accomplished with a few clicks of the mouse. Below are the steps for each method. After you understand how to use each, you’ll be ready to posterize your images. Read on for more information. If you want to learn more, read our article on the topic.
Downsampling in the time dimension
In order to post-process images, you can use a tool known as downsampling. Downsampling reduces the resolution, bit rate, and output precision of a picture. It can also produce undesirable effects such as banding, stop-go motion, and motion blur. Here are some steps to post-process your photos to avoid posterization. Before you start, make sure that your images are in the correct format.
Downsampling in the bit rate
In order to reduce the size of an image, most image editing programs provide a feature known as posterization. Posterization reduces the bit rate and resolution of an image to a level where it can be printed or viewed. This can be done to achieve artistic effects such as blurring or reducing noise. But it is important to remember that reducing the resolution also reduces the precision of output.
When done correctly, posterization can reduce the size of an image without altering the appearance of the image. While posterization that uses few color levels creates an effect similar to a 1970s rock poster, a posterization with many color levels makes the file smaller without losing much quality. In addition to downsampling, posterization can also reduce the appearance of color banding by dithering the image. Dithering the image adds noise to the color bands so that they appear less sharp.

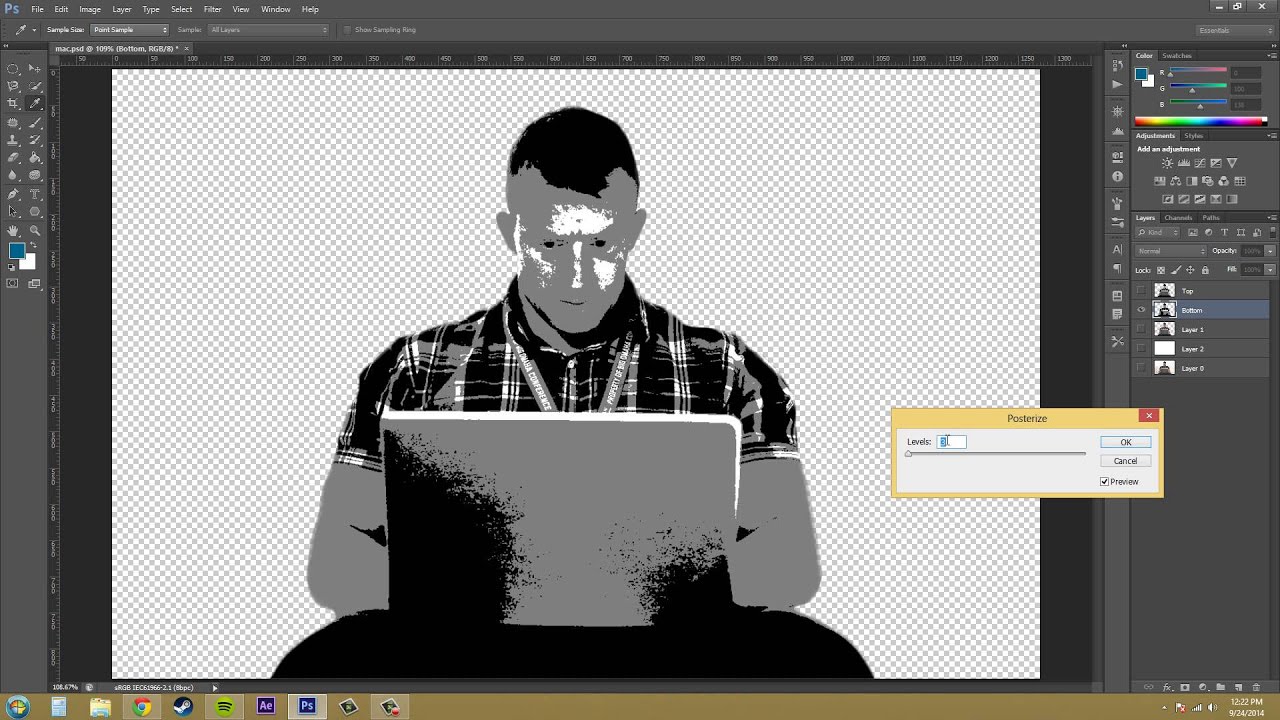
Creates a fake vector effect
There are two ways to create a fake vector effect in Photoshop. First, you need to import a shadow separately from the object you want to convert into a fake vector. After importing the shadow, you need to apply a Smart Sharpen filter to add glowing lines. Next, use a Surface Blur filter to add lots of details. Then, lower the opacity to around 40 or 50 percent. This will give your photo an image that looks like it’s drawn in vector format.